This topic is available on video!
View > Video: Donation Batches Overview
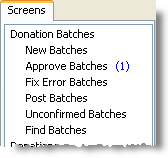
This topic refers specifically to the Donation Batches menu items on the Screens Pane.

Donation Batch process
For normal batches without errors. These steps would typically not be performed at the same time. For example, receipts may not be printed for weeks or months after the batch is posted.
1.Gather donations to be entered into DonorWise. These become the "Batch" to enter into DonorWise.
2.Manually create a donation batch in DonorWise, either through entering donations or by importing a .csv file.


3.Enter donation information on batch screens.

4.Mark the donation batch complete.


5.The financial manager approves the batch. Once a batch is approved, it cannot be edited or deleted; it can only be reversed.


6.Print and file the <Batch Transactions Report>.
7.Post batch. This sends the batch to the General ledger.


8.Confirm the batch. This acknowledges that the batch has posted in the General ledger. With an Integrated General ledger, this happens automatically.


9.Print receipts.

About donation batches
•Donation entries into DonorWise are made in batches.
•A batch is a logical grouping of transactions. It corresponds with a batch or journal in your General ledger. The most common batch is an individual deposit (of cash or checks), or a set of bank transfer deposits from the bank statement.
•You may choose to group donations according to various criteria as described below.
Possible recommended groupings:
By specific deposit
|
Donations are posted to DonorWise according to the date in the batch header. Each batch has its own date.
|
By type of fund
|
With a large volume of daily donations, you may want to separate your batches based on type of funds, bank used, or currency used. If you have multiple daily batches, you should make each batch a separate deposit.
|
By time period
|
With a minor volume of daily donations, you may choose to combine a week's worth of donations into one batch, based on how they were deposited. Again, one deposit per batch.
|
By bank statement (for gifts given through the bank)
|
Many ministries receive most of their donations through a direct bank transfer. In these cases, a ministry will typically record all of the bank gifts (that is, gifts-via-bank) into one batch.
|
There are other factors that may affect the making of batches. For example, wire transfers to your bank may occur without your knowledge and you may not know about them until you receive a bank statement. It may make sense to batch these together.
Discouraged groupings:
Multiple bank deposits
|
Logically, a deposit into the bank may constitute several batches but you would normally not have a batch divided between several deposits. (This does not include gifts given directly via the bank, which would typically be combined into a single batch before recording.)
|
By period
|
A batch is posted into your General ledger according to the accounting period. Thus a batch can never contain donations from different periods (months).
|
The batch size is not limited either in DonorWise or in most General ledgers. However, it is easier to locate errors if batches are not too long.
Overview: Entering Batches
1.Decide whether this is a donation batch or a transfer batch.
Donation batches are primarily donations, but include any type of incoming funds including material sales, conference revenue, etc.
2.Select the <New Batches> link.
3.Press the <New Batch> button.
4.Enter a descriptive name for the batch.
5.Verify the batch will post in the correct period (typically the open period).
6.Select the date of the batch.
7.Press the <Next> button.
8.Enter the payment type(s) and amount(s) for each payment type.
9.Press the <Next> button.
10.Enter the contributions in the batch.
11.Press the <Mark Complete> button.
12.The batch will now be ready for Approval and appear in the Approve Batches screen.
Read More
Creating a new Donation Batch
Entering a Donation
Creating a new Transfer Batch
Video: Batch Entry Screen Overview
Video: Creating a new Donation Batch
Video: Transfer Batches
Video: Reverse-Correct-Refund Overview
Exercises
1.Create a batch for these exercises.
Description
|
Donation Process — Introduction
|
Period
|
Use the current Open period
|
Date
|
Use today's date
|
Payment Type
|
Use "Cheque"
|
Amount
|
€ 85
(Euros are the default currency in the sample database)
|
2.Enter the following cheques in the batch.
Amount
|
Payment Type
|
Donor
|
Designation
|
€5
|
Cheque
|
Tweety & Tweetilee Bird
|
Bob & Helen Parr
|
€5
|
Cheque
|
Bambi & Feline Deer
|
Bob & Helen Parr
|
€12
|
Cheque
|
Daffy & Daphne Duck
|
Bob & Helen Parr
|
€15
|
Cheque
|
Fred & Wilma Flinstone
|
Bob & Helen Parr
|
€8
|
Cheque
|
Winnie the Pooh
|
Bob & Helen Parr
|
€40
|
Cheque
|
Buzz Lightyear
|
Bob & Helen Parr (€15)
Bruce Wayne (€25)
|
Note that this last donation is a split gift that goes to two designations.
Split Designations
In some cases, a donor may want to support multiple items with one donation. A "donation" is the total amount received from a donor. A "gift" is the portion of that donation that was assigned to a specific designation.
1.On the donation entry screen, enter the total amount of the donation in the "Amount" column of the "From" line.
2.On the first "To" line, enter the first designation, then the amount. If the amount for this designation does not equal the total donation amount, DonorWise will automatically provide an additional line for the next designation.
3.On the second "To" line, enter the next designation and amount. DonorWise will keep adding new rows until the sum of all the splits equal the total donation amount.

3.Press the <Mark Complete> button.

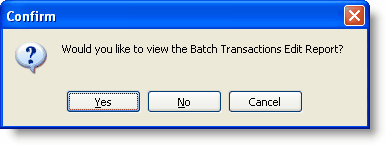
4.When the batch report message appears, press the <No> button. (You will print the batch report after Approval.)
