You need to host a simple text file on your site that describes to TntConnect what your various endpoints are. It's in the "ini" format. As an example, here's some actual endpoints:
The ini file has several sections ( //comments in blue should not be in actual file):
|
[APPLICATION]
MinimumVersion=3.4.8 // minimum version of TntConnect required
RecommendedVersion=3.4.8 // recommended version of TntConnect
[LetterService]
// if you move your query.ini url, you can put in a redirect here to update TntConnect
RedirectQueryIni=
// url to your logo (300x100)
LogoUrl=http://www.example.com/static/images/logo100.png
// url for new customer to learn about your service
AboutUrl=http://www.example.com/tntconnect
// for simple integration, just provide a url to TntConnect-specific instructions … done! … stop here
HowToOrderUrl=http://www.example.org/TntConnectInstructions.pdf
// advanced: optional way to allow for authentication persistence via OAUTH access token
AuthorizationRequestUrl=https://www.example.com/tntconnect/authorize?tntdb=$TNTCONNECT_DATABASE$&redirect_uri={redirect_uri}
// advanced: optional endpoint for TntConnect to exchange a temporary token with a real token
AuthorizationCompleteUrl=https://www.example.com/tntconnect/token?code={code}&redirect_uri={redirect_uri}
// advanced: optional endpoint for TntConnect to revoke access tokens
AuthorizationRevokeUrl=https://www.example.com/tntconnect/authorize_revoke?token=$ACCESS_TOKEN$
// deprecated: optional way to allow for authentication persistence via OAUTH access token
AccessTokenRequestUrl=https://www.example.com/tntconnect/authorize?tntdb=$TNTCONNECT_DATABASE$
AccessTokenCompleteUrl=https://www.example.com/tntconnect/authorize_callback
// deprecated: optional endpoint for TntConnect to revoke access tokens
AccessTokenRevokeUrl=https://www.example.com/tntconnect/authorize_revoke?token=$ACCESS_TOKEN$
// advanced integration: provide url to upload CSV of partners
// return url to launch in user's default browser to complete order
CsvInvariantFieldNames=True
CsvLocalizedFieldNames=False
CsvUploadUrl=https://www.example.com/tntconnect/upload_file?v=1&ACCESS_TOKEN$
|
For simple integration...
You can stop with "HowToOrderUrl".
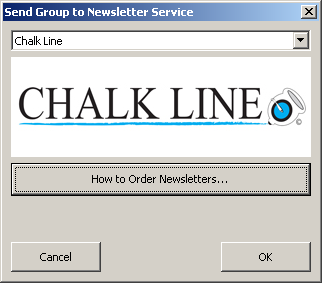
[LetterService]
LogoUrl=http://www.chalkline.org/CL_logo.jpg
AboutUrl=http://www.chalkline.org/
HowToOrderUrl=http://www.chalkline.org/order_ev_tnt.html |
The integration will look like this:
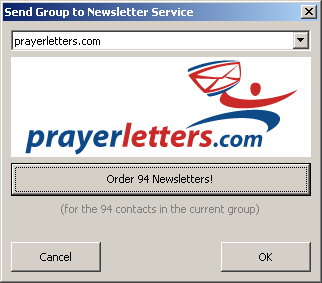
For advanced integration...
You must provide the "CsvUploadUrl". The integration will look like this:
Authentication is optional, but if you want to provide TntConnect with an OAUTH token, you can. The benefit is that the user doesn't have to login to your service each month to send their newsletter.
Deprecated Info
To provide for OAUTH authentication, you must provide the following endpoints:
- AccessTokenRequestUrl
- AccessTokenCompleteUrl
If you include $TNTCONNECT_DATABASE$ in your AccessTokenRequestUrl, it will be substituted for the name of the current TntConnect database file. (Prior to TntConnect 3.1.11, only $TNTMPD_DATABASE$ will be recognized.) This way you can associate tokens with TntConnect databases for future reference. Once user is logged in, redirect the user to the AccessTokenCompleteUrl with the access token in the fragment portion of the url as #access_token=xxxxx In the CsvUploadUrl, $ACCESS_TOKEN$ is substituted for the OAUTH access token.
To provide for OAUTH authentication, you must provide the following endpoint:
If you include $TNTCONNECT_DATABASE$ in your AccessTokenRequestUrl, it will be substituted for the name of the current TntConnect database file. This way you can associate tokens with TntConnect databases for future reference.
Once user is logged in (and approves access), redirect the user to the {redirect_uri} provided by TntConnect. You can either:
- modified OAuth 2.0 "Implicit": Return the access token directly by adding an "access_token" parameter to the redirect_uri url.
- OAuth 2.0 "Authorization Code": Or you can return a temporary "authorization code" by adding a "code" query string parameter. TntConnect will send that code to the AuthorizationCompleteUrl (in place of the {code} placeholder). TntConnect will also include the original {redirect_uri} used. The access token will then be returned via json as an "access_token" member (as per the OAuth 2.0 spec).
If an error occurs, you can redirect the user back to the redirect_uri with an "error" query string parameter (and optionally and "error_description"). "access_denied" is what's expected as the "error" if the user simply cancels.
If you don't want to support an OAUTH access token, don't include any of the AccessToken* urls, and don't include $ACCESS_TOKEN$ in our CsvUploadUrl.
CsvUploadUrl
TntConnect will POST the current group as UTF-8 CSV text in the body of request.
By default, the non-localized field names are included as column headers. But you can control the field names via the CsvInvariantFieldNames and CsvLocalizedFieldNames settings. These are True/False settings. You can include both as True! If you do, invariant (non-localized) field names will always be on the first row, and the localized field names will be on the 2nd row. You might want to include localized field names because these match up better to the mail merge fields in documents uploaded by the user. But you might also want non-localized field names so you when you receive CSV uploads from non-English versions of TntConnect, you know what the fields stand for (i.e. you know which field is the Mailing Address Block for envelopes).
If there is an error, the service should return:
- HTTP 401 if access token is invalid and needs to be reaquired.
- or HTTP status 200, with “ERROR” on first line of body, actual error message on 2nd line.
ERROR
Example error message |
If successful, return either:
- HTTP 200, with body of “LaunchBrowserUrl=xxxxxx”
| LaunchBrowserUrl=http://www.example.com/startorder?id=123123 |
- or a standard HTTP redirect (HTTP 301/302/303 w/ Location header)
The user's default browser will then be launched with the url returned so they can complete the order.
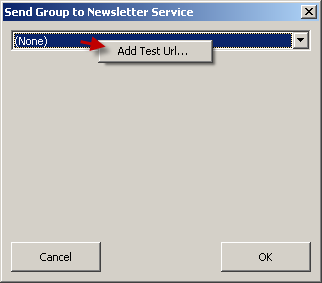
HOW TO TEST
To test your ini url, hold down the Ctrl (or Command key on a Mac) key and right-click on the drop down list:
READY?
When you have your url ready, send me an email at: troy@tntware.com. Tell me the NAME and URL in the email. Once I add you to the official list, TntConnect will be updated immediately.