The easiest way to maintain a list of account transfers for your staff (or any designation) is with an Excel file.
Creating a new Import Transfer batch
1.Prepare your Excel file.
Field Name (type exactly as shown for required fields)
|
Required?
|
Description
|
Payment Type Code
|
Yes
|
Must be TRANSFER
|
Donor ID
|
Yes
|
This is the designation that is giving the gift
|
Designation ID
|
Yes
|
This is the designation that is receiving the gift
|
Tendered Amount
|
Yes
|
This is the amount of the gift (in your base currency)
|
From
|
No
|
For your reference, as it makes it easier to identify the name of the donor
|
To
|
No
|
For your reference, as it makes it easier to identify the name of the designation
|
End Date
|
No
|
For your records. Sort each month by this field so that you know when to stop a transfer. For transfers with no end date, select a date far in the future.
|
Here is an example of what the Excel file would look like:

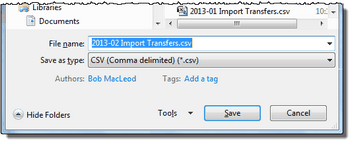
2.Save as a .csv file.

Importing the Transfer Batch
3.Select the <New Batches> screen.

4.Press the <Import Batch> button.

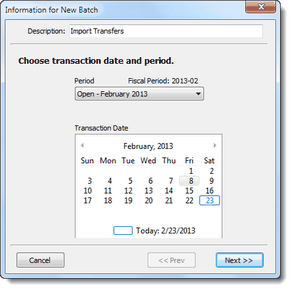
5.Enter a Description (such as “Import Transfers”—use the same name every month for consistency). Select the accounting period and date. This date will apply to all transfers in the batch. Press the <Next> button.

6.Press the <Browse> button. Select the .csv file. (Double-click or press the <Open> button.)

7.Press the <Next> button.

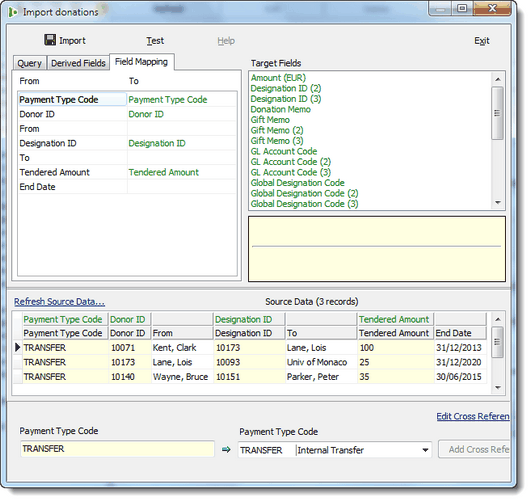
8.The Import donations screen will show all of the fields, with the four required fields already selected (if you typed them exactly). At the bottom of the screen is the data that will import. (Notice that the From, To, and End Date columns do not have headers; these columns will not import into the batch.)

9.Press the <Test> button to test for accuracy.
10.Press the <Import> button to complete the import. The rest of the steps are the same as a normal bank transfer batch.
Read More
Transfer Batches
Creating a new Transfer Batch (Manually)