How to Install DonorHub Lite
1.Download and install DonorHub Lite.
2.Launch the application for the first time.
3.Create a new database
Menu Path: File | New Database
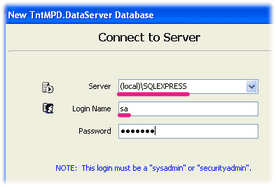
4.Enter the SQL Server name. If you installed SQL Server 2005 Express onto the same computer, it would be: "(local)\SQLEXPRESS". When prompted for a username and password, enter "sa" as the username, and the password for "sa" (probably the same one you defined when you installed SQL Server 2005.).

5.Press the <Next> button.
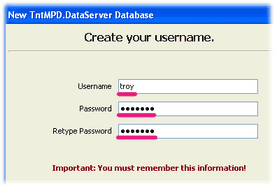
Create your username and password. You must remember this. This is what you'll constantly be using each time you login to the program.

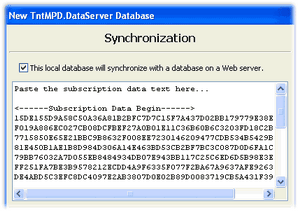
6.If your web site administrator provided you with "Subscription data text", then check the box for "This local database will synchronize with a database on a Web server." and paste the subscription data text into the box that appears below. When you click "Next", you may be prompted for a password. In this case, a password should have been provided to you separately by your web site administrator (via a secure communication).

7.Press the <Next> button.
You must provide a name for the database. Use "dataserver_abc" where "abc" is a short abbreviation for your organization.
8.Press the <OK> button.
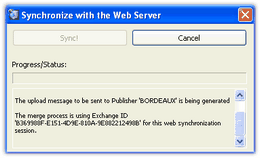
After a slight pause, the database should be created. If you are synchronizing with a remote Web server, you will be required to synchronize once before the program can open. Then you will be in the main program.

Congratulations! You've installed DonorHub Lite and created your local database.
Next step: Configure DonorHub Lite
Read More > How to Configure DonorHub Lite