This tutorial is designed to acquaint you with the TntSync process, but cannot cover all the nuances of TntSync.
Remember, while TntMPD does automatic backups, those are saved on your computer's hard drive. You should still save your files on an external drive, CD/DVD, etc.
Leer más > Copias de seguridad
Mantener dos bases de datos de TntMPD sincronizadas con TntSync
1.You must have two copies of your database before you can synchronize them. This is natural if you have two computers on which you are already using TntMPD. You do not need to use TntSync solely for the purpose of maintaining a backup copy of your TntMPD database, because TntMPD automatically creates a backup copy every time you exit (and other times as well).
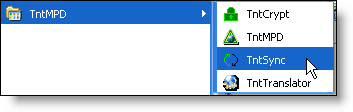
2.Start TntSync either from within TntMPD by selecting TntSync from the Tools menu, or by going to your Windows, Start Programs menu and selecting it from the TntMPD folder:
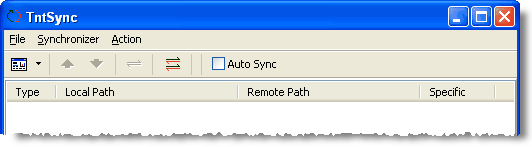
3.Verás la herramienta TntSync, y la lista de archivos y carpetas estará en blanco.
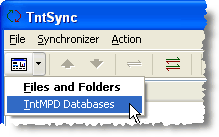
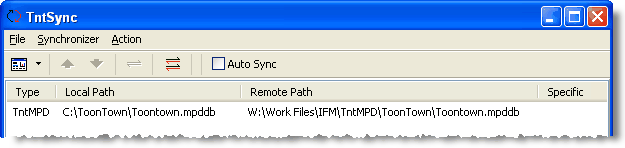
4.Add a new synchronization item.
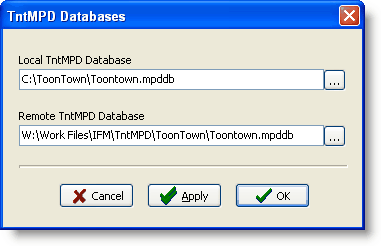
5.Browse for the Local and Remote databases.
Haz clic en el <Aceptar> botón.
6.Ahora verás las bases de datos de TntMPD en la lista de archivos.
7.Haz clic en el <Sincronizar todo> botón.
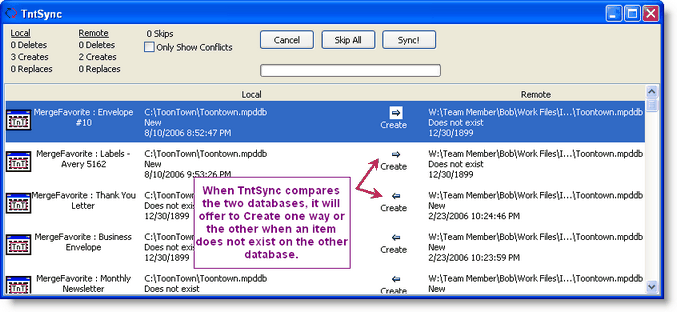
8.TntSync will now begin working through the synchronization cycle. It compares some underlying codes to see if they have changed. Then it moves on to the various types of data. This tutorial will not cover each individual step, just the basics of what TntSync does.
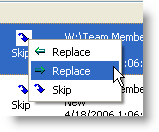
9.At each stop in the process, TntSync will show you what it is going to do when you press Sync. This will either be "Create" in one direction or the other, "Delete" in one direction or the other, or "Skip" if there is a conflict. There is also a "Replace" option. The options displayed vary depending on the situation.
Haz clic en el <Sincr.> botón.
10.When there is a conflict, TntSync will offer only to Skip the conflict. You can see how many skips there are, and show only them, by checking the box "Only Show Conflicts".
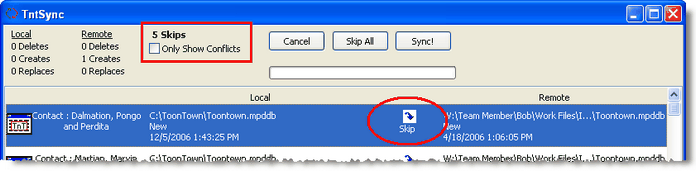
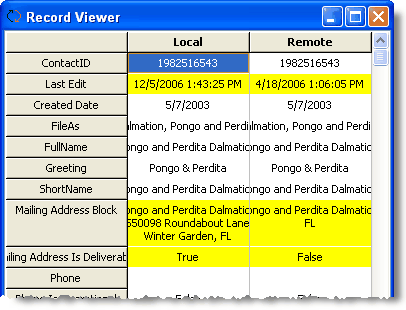
11.To view the record and see which data field is in conflict, double-click anywhere in the row. TntSync will bring up the local and remote database record side-by-side and show in yellow where the conflicts are. In this example, the Dalmations' address is different in both databases. More importantly, they have both been updated independently since the last synchronization (otherwise TntSync would have recommended replacing one over the other). Be sure to scroll down to look for other conflicts!
12.If you know you want to keep one over the other (in this example, the Local is the more correct one), then close this box, and change the "Skip" to "Replace" by right-clicking on the Skip icon.