Tutorial: Setting up a new Saved Group
In this example, we will set up a Saved Group called "Friends with Superpowers" that identifies all the members of our ToonTown database who have special superpowers.
| 1. | Press the <Groups> button. |

| 2. | Since this is your first group, your entire Groups screen will be blank: |
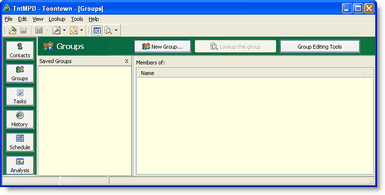
| 3. | Press the <New Group> button. |

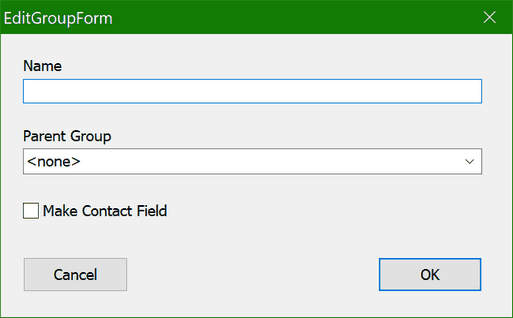
| 4. | Enter a name for your group. You can leave Category blank for now, and add a Category later. |
Categories allow you to group related groups together. You can select an entire category when using Lookups to lookup all members of all Saved Groups in a category.
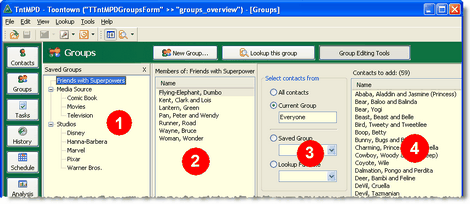
| 5. | You will now see the full Groups View, which has four panels. |
Panel 1
|
List of all Saved Groups
|
Panel 2
|
Members of the selected Saved Group
|
Panel 3
|
What to compare the selected Saved Group to
|
Panel 4
|
Contacts from the comparison list
|
| 6. | Show or hide the group editing tools. |

|
Turns off the editing tools.
|
| 7. | Select all of your ministry partners one at a time on the list. You can use the buttons, or double-click on the names. |

|
Moves the selected contacts into the Saved Group.
You can also drag-and-drop contacts from the list on the right into the selected saved group, or you can drag a contact from the list on the right into ANY saved group in the list of groups.
|
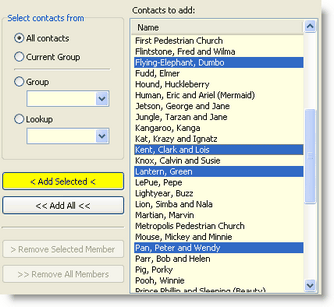
| 8. | Notice that the contacts in the right are now grayed out and italicized. This indicates that these contacts are in the group. |
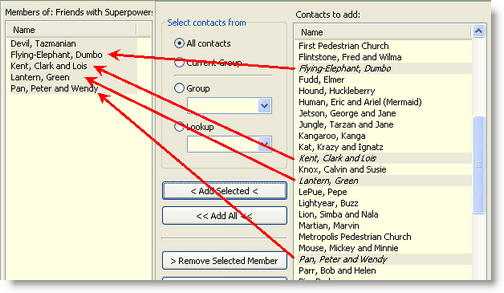
| 9. | Try this: Compare your group to another group. Press the <All contacts> radio button. You will notice that members of that group (all contacts) who are not in the Saved Group are normal text, while contacts who are already in the Saved Group are italicized. |


|
Makes this Saved Group into the Current Group, and shows you the Contact View.
|
| 11. | Finally, you can view which groups any contact is a member of by clicking on the Groups tab in the Contact View. |
