Mail Merge-Labels
One of the handiest features of TntConnect is the ability to merge your contact information with Microsoft Word to merge envelopes, mailing labels, newsletters, e-mail messages, and more. This tutorial was created using Windows XP and Word 2007.
Tip: Mail Merge familiarity
Using Mail Merge in TntConnect will be much easier if you are already familiar with using Mail Merge in Microsoft Word. Trial and error is the best way to learn this process, so be patient the first time you attempt this, and don’t be afraid to try it a few times for no other reason than to become familiar with the process.
Read More > Practical Merge Tips
Tutorial: Creating a Mail Merge for Labels
| 1. | Select the group who will receive your newsletter. For example, select your newsletter recipients. |
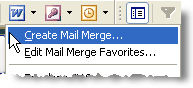
| 2. | Select the mail merge menu item, or press the Microsoft Word button on the button bar and select "Create Mail Merge". |
| 3. | Select the <New Document> radio button (the default). |
Then select the Mail Merge Options document type for "Mailing Labels"
Press the <OK> button.

Contact Data box
If you want to save the contact list (a .csv file) for later use, enter a filename here. Otherwise, TntConnect will create a temporary file and automatically delete it when you exit TntConnect. For a regular mailing like a newsletter, it is better to not save the file, so that each month you are using a Lookup to capture the most current list of newsletter recipients.
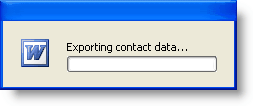
Wait while TntConnect exports your contact data to a file.
| 5. | Word will ask you to define the label you want. |
Press the <Setup> button.

| 6. | Select your paper size (such as Avery A4 or Avery US Letter) and then your specific label. |

Press the <OK> button.
Press the <Close> button.
| 7. | Once TntConnect opens your document, position your cursor at the place in your document where you want the TntConnect field to go. |
Press the <Insert Merge Field> button.

In Word 2003 this button does not have a name:

The label after you have inserted the field:

| 8. | Mailing Labels are different from other merge types (such as newsletters, envelopes, or e-mail messages) because a single page will have multiple contacts on it. So you will need to tell Microsoft Word to move to the next contact by inserting Word's "Next Record" command. |
Word 2007
|
Word 2003
|
Press the <Rules> button.
|
Press the <Insert Word Field> button.
|

Select "Next Record"
|

Select "Next Record"
|
Word will insert "Next Record" in every cell of the table. You need to go to each label and insert the "Mailing Address Block" field before the "Next Record".

| 9. | Now press the appropriate Microsoft Word button to complete the merge. |

Read More
Read More > Tutorial: Mail Merge
Read More > Tutorial: E-mail Merge
Read More > Mail Merge Favorites
Read More > Practical Merge Tips