Si la organización soporta descargas de internet, puedes descargar los donativos directamente de la organización. Muchos misioneros decidirán hacer esto al mismo tiempo que descargan sus direcciones del internet.
TntMPD will connect with your organization’s donation system if your organization supports web-download of donation data. You can do this when you are setting up your database, or at any time after your database is set up.
Paso a paso: Obtener donativos desde el internet
1.Haz clic en el <Entradas> botón.

2.Select your organization from the drop-down list and enter your login and password you use to access your donor software. TntMPD will remember your login and password for future downloads.
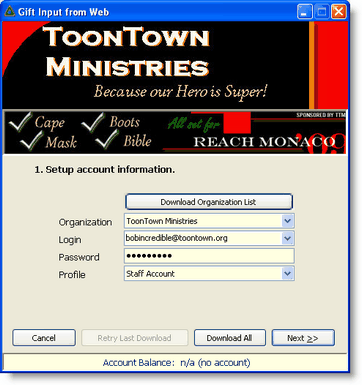
Consejo práctio: Saldo de cuenta con tu organización
You can see if you are correctly linking with your organization during the Gift Input process. When you walk through the Gift Input screens, your Account Balance should appear at the bottom. Sometimes your ministry systems are off-line, or maybe your internet connection is not working.

If your organization does not support this feature, the Account Balance will appear as "n/a".

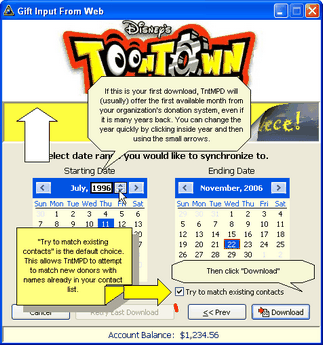
3.Select the date range to synchronize. The first time you download, the displayed calendar will show the earliest date available for your organization. In future downloads, TntMPD will go back about 3 weeks.
Check "Try to match existing contacts" if you want TntMPD to match downloaded contacts with existing contacts already in your database.
4.Haz clic en el <Descargar> botón.

5.Downloading addresses and gifts from your ministry’s donation system can be a time-consuming process, especially the first time. You can download addresses separate from the gifts, or you can download address changes at a later date.
Leer más > Obtener direcciones desde internet
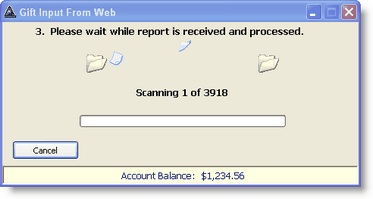
6.Hace falta esperar mientras TntMPD descarga los contactos del sistema de donación del ministerio. TntMPD descargará todos los donantes activos en el archivo tuyo y no solamente los que donaron en el rango de tiempo seleccionado.
7.Si ya has cargado los contactos en la base de datos, TntMPD te pedirá que hagas coincidir cada contacto descargado con un contacto existente. Esto puede consumir mucho tiempo, pero es una de pocas tareas devoradoras de tiempo con los que tropezarás cuando instales TntMPD.
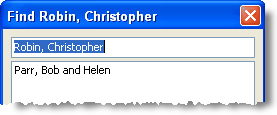
8.Haz clic en el <Siguiente> botón.
TntMPD will add the contacts to your database.
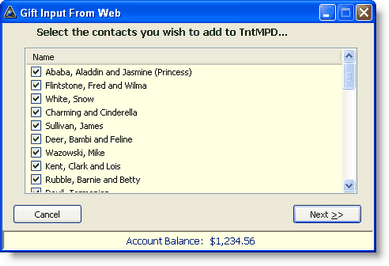
9.Once TntMPD has added all of your contacts, you will also see a list of all gifts to be downloaded.
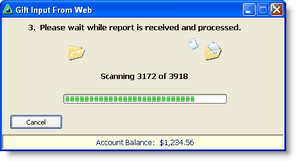
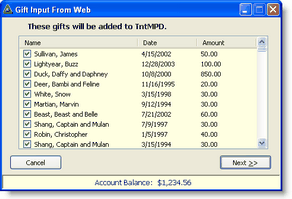
10.Haz clic en el <Siguiente> botón.
Consejo práctio: Editar donativos durante la descarga
When downloading gifts via the Web, double-click on any gift in the list to edit the gift and appeal information, add a memo, etc. You can also edit gifts later on the MPD Tab for any contact.
Leer más > Editar donativos
11.Finish the synchronization.

|
Finish and add all gifts to your database.
|

|
If you do not want to add the gifts to your database.
|
Nota: A veces TntMPD no puede sincronizar con la organización y tendrás que hacer la descarga y sincronización otra vez. Eso no se afectará los donativos ya descargados.
Nota: No tienes que preocuparte con descargar el mismo donativo más que una vez. Cada donativo tiene un número de identificación único. Cuando un donativo es descargado más que una vez, TntMPD reconoce cualquier número de identificación que ya se descargó y lo descarta.
Consejo práctio: Ajustes a donativos
By default, TntMPD goes back three weeks from your last download of gifts. So if you downloaded two weeks ago, TntMPD will go back five weeks to check for gift adjustments. Sometimes, however, your organization may adjust a gift from many weeks, or even months, in the past.
To check for these adjustments, periodically set your Start Date for gift download back one whole year. Then TntMPD will download all gifts from the past year and check your TntMPD database for matches. By doing this, you can see any gifts that are added and/or deleted.
Leer más > Paso a paso: Descargar donativos desde internet
Tip: Staff Portal / Ministry Web Site
1.Click on the top banner to go to your ministry's web site or your ministry's "Staff Portal"
2.Click on the middle banner to go to the advertised event or item
